
An Introduction to Elevated terrain in Garden Planner
( or … how do I make terraces and slopes).
The 3d view in Garden Planner is still a developing feature and one of the parts of the 3d view is still being refined in terrain modification. However it is already possible to created sloped or terraced terrain in the 3d view. So let's look at how you do it.
You need to use the Garden Bed tool to draw the lawn or soil you wish to elevate or slope. (Or you can drag a garden bed to the plan from the Ground Cover category).
To start let's draw a rectangular garden bed and place one shrub on the bed. In design view it will look like this.
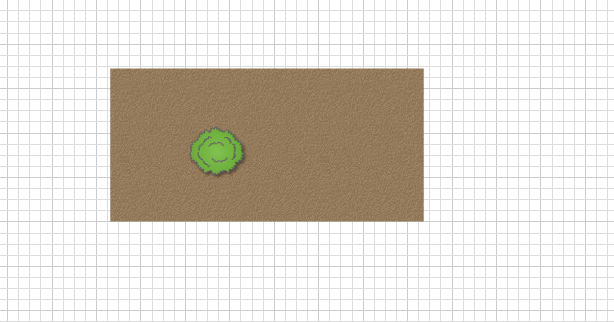
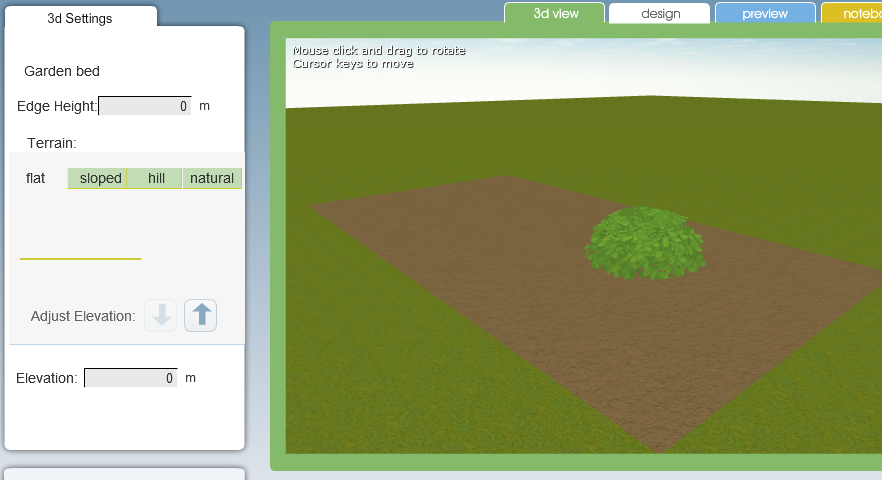
If you switch to the 3d view it will look like a rectangle of dirt with a shrub on it, which is what you would expect.
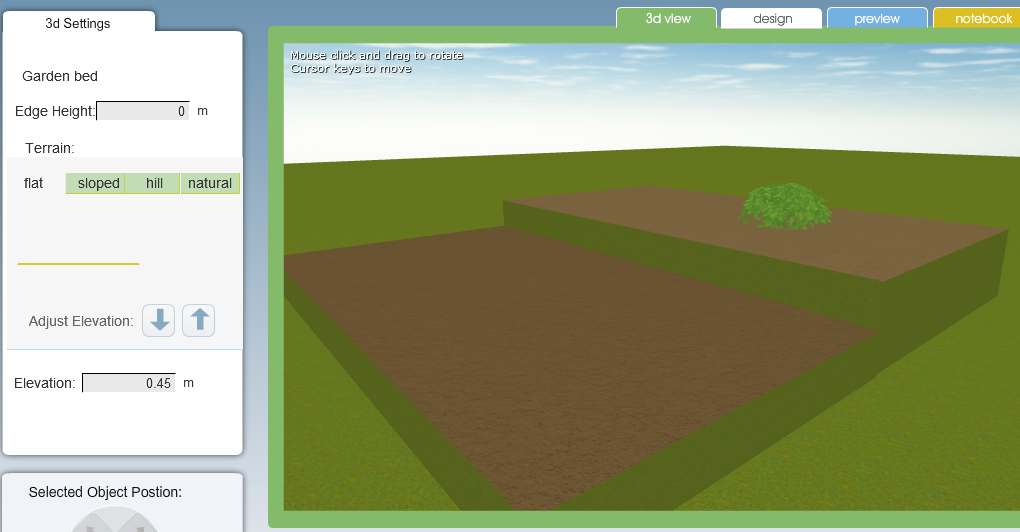
If you select the garden bed you will see the following options to adjust the elevation and slope.
There are four tabs that let you adjust the elevation. Let's start with the first one labelled flat.
This is the option to use to create a terraced garden.
If you click on the up arrow button next to the words Adjust Elevation it will raise the ground. Click it a few times and you will end up with something like what is shown below.
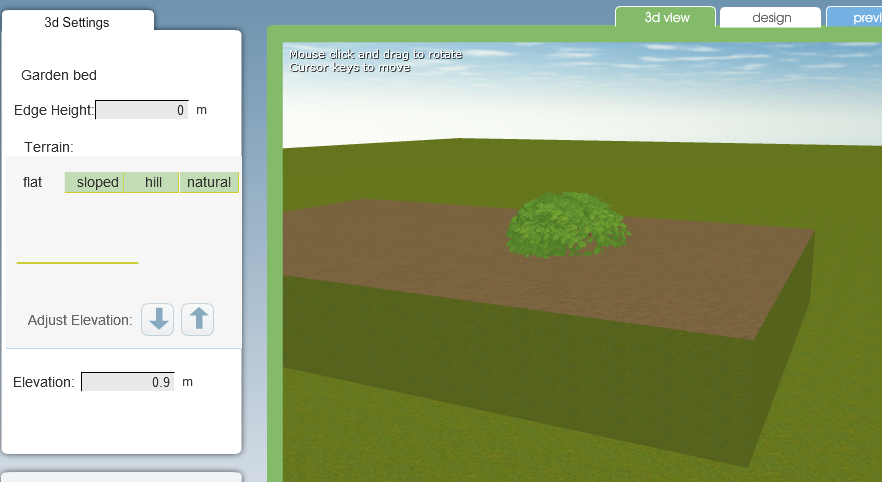
You can see that the plant is also raised with the garden bed it is resting on.
(NB: if the plant or objects don't automatically adjust to the new terrain height try switching to design view and then back to 3d view. In some cases garden planner will not automatically change object elevations for performance reasons)
If you select the plant you will see its 3d properties as shown below
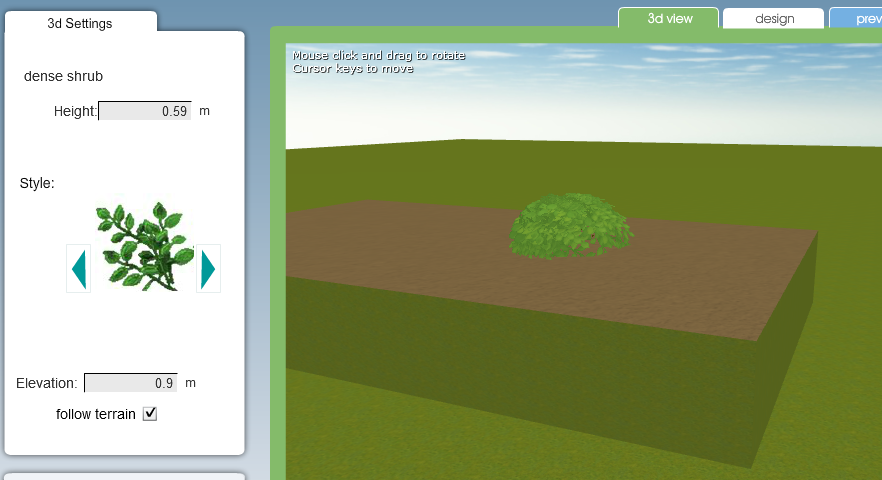
At the bottom of the properties is a check box that says Follow Terrain and it will be ticked.
If you un-check this it will appear that the plant has disappeared but it hasn't. It just is no longer following the terrain of the garden bed. Ie: it is no longer sitting on the bed it's actually on the ground and we cant see it because it is within the bed. Check it again and it will appear back on the bed. In most cases you will want plants to follow the terrain but you may find that you dont want walls to follow the terrain. (More of that later).
Ok so now in the design view will add in another adjacent garden bed as shown below. To make things clearer we have made the new bed slightly darker in color.

In the 3d view this new bed will be at ground level but we can increase its elevation to make it slightly lower than the first bed, thus creating a terrace effect.
You can then repeat this technique to create multiple terraces with a selection of plants and objects on the different levels.
TIP: in most cases if you change the elevation the objects on the garden bed will move up or down as you adjust it. However if an object doesnt appear at the correct elevation you may want to just click on the 3d View tab (the green tab) as this will force garden planner to re-calculate all the elevations and interactions of all objects.
What about walls?
If you are creating a retaining wall you will probably want to draw it in the 3d view so it appears along the edge of a garden bed. But the elevation of the wall may be wrong. In the example below I've drawn the wall slightly longer than the actual bed and so the end is going down to the ground.
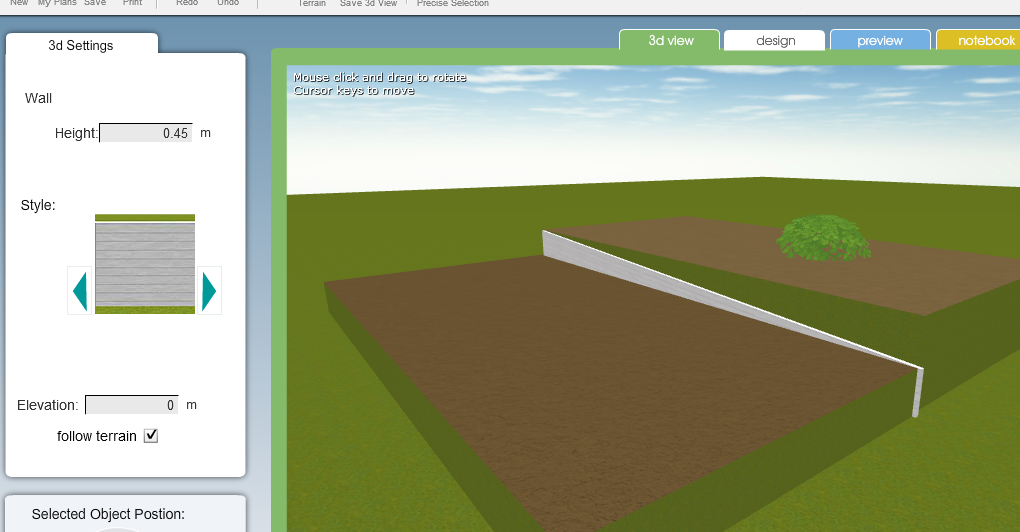
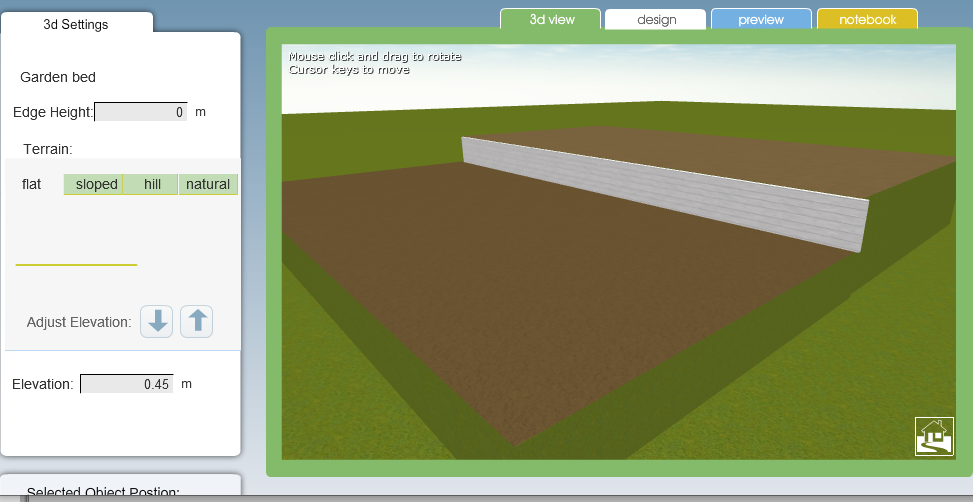
However if I un-check the follow terrain option and manually set the walls elevation to the same as the bed elevation I get the result I want.
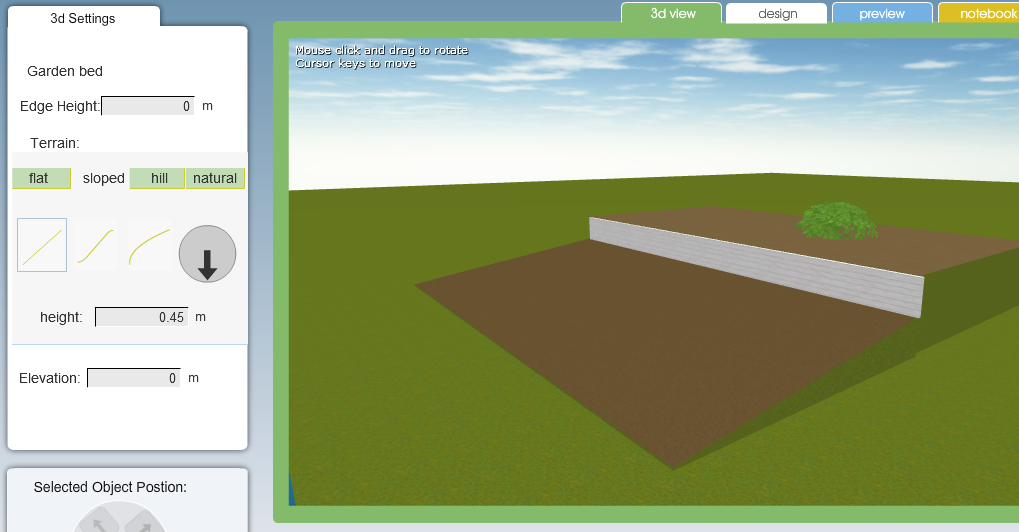
What about a sloped lawn or bed?
If you want the garden bed to slope then you use the sloped tab on the garden beds terrain properties.
So if I wanted the second bed in my example to slope up from the ground level to 0.45m I would first select the bed. Then I would set its elevation to zero by either clicking the elevation down arrow button or by entering the value 0 into the elevation.
Then I would select the slope tab and set the slope height to 0.45m see below
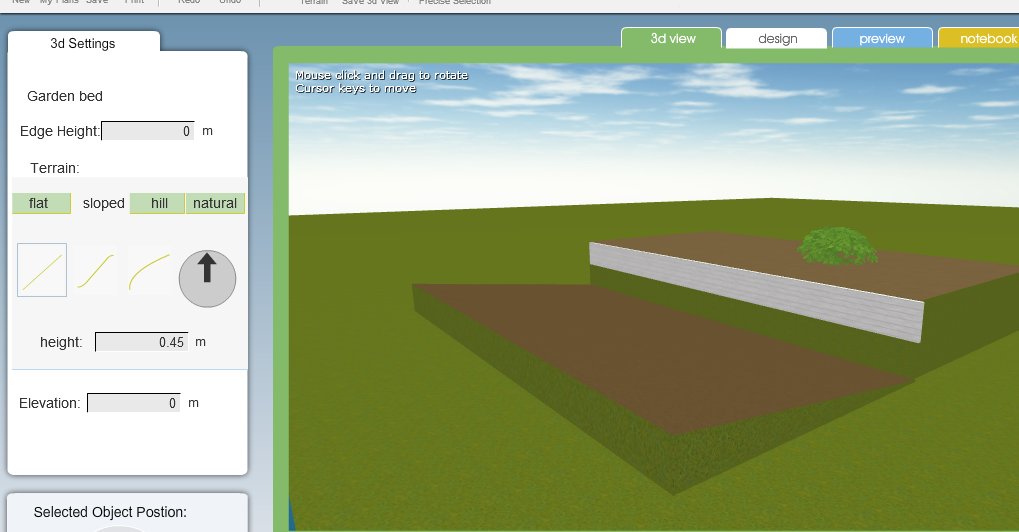
Ahhh but something is wrong. The slope is pointing the wrong way. So I click on the arrow to have to point in the other direction.
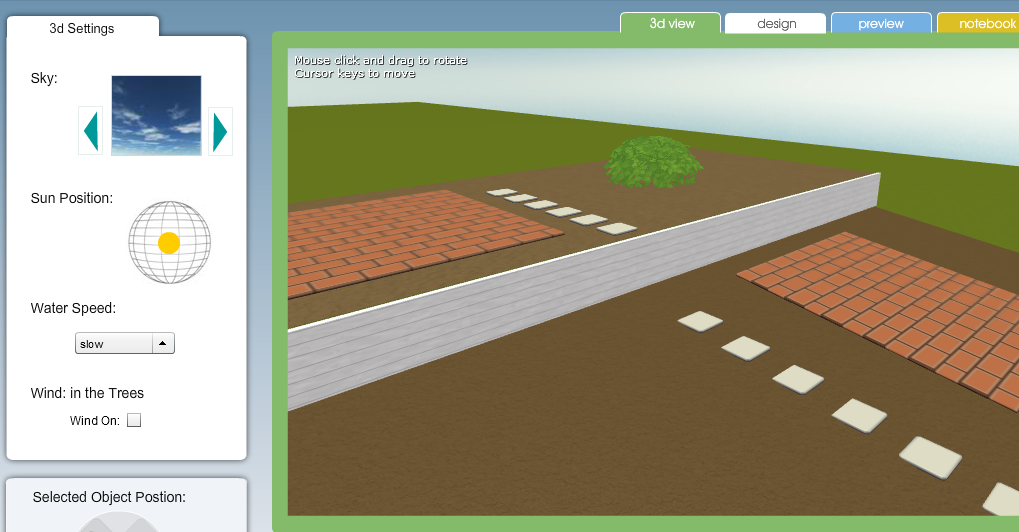
Paths and Paving
If you add paths or paving the should follow the garden bed terrain under them.

A video tutorial on adjusting terrain can be found here